7 Mistakes You’re Making with Your Custom Engine Build (and How to Fix Them)

7 Mistakes You’re Making with Your Custom Engine Build (and How to Fix Them)
There is nothing quite like the first fire-up of a custom-built engine. That initial roar: the culmination of late nights, greasy fingernails, and a significant investment of your hard-earned cash: is the ultimate reward for any gearhead. But for many DIY builders, that triumph is short-lived. A knock develops, oil pressure drops, or a “mysterious” vibration turns a high-performance dream into a pile of expensive scrap metal.
At FT Motorsports, we’ve spent over 20 years under the hood and on the dyno. We’ve seen it all, from botched ls swap shop projects to precision-engineered racing machines. As a specialized performance engine builder, we often take on the complex drivetrain work that other shops won’t touch. We know that the difference between a legendary build and a total failure is often found in the thousandths of an inch.
If you’re tackling a custom engine build, you’re already part of an elite group of enthusiasts. However, even seasoned builders can fall into traps that compromise longevity and power. Here are the seven most common mistakes we see in the shop and, more importantly, how you can fix them before you turn the key.
1. The “Wet” Bearing Trap
It’s a natural instinct: you want everything in your engine to be lubricated. Many DIY builders think that putting a thin film of oil or assembly lube on the back of the engine bearings (the side that touches the block or the rod) will help them seat better or prevent corrosion.
The Mistake: Installing bearings “wet” is a recipe for disaster. Oil trapped between the bearing shell and the housing creates a barrier that prevents proper heat transfer. More importantly, it can cause the bearing to lose its “crush”: the tension that holds it firmly in place: leading to a spun bearing the moment you hit high RPMs.
The Fix: Keep those bearing saddles and backs bone dry. Clean them with a lint-free cloth and a bit of brake cleaner to ensure there is zero residue. You should only apply assembly lube to the face of the bearing where it contacts the crankshaft journal. At FT Motorsports, we treat this as a surgical procedure; cleanliness and dryness on the contact surfaces are non-negotiable for a reliable custom engine build.
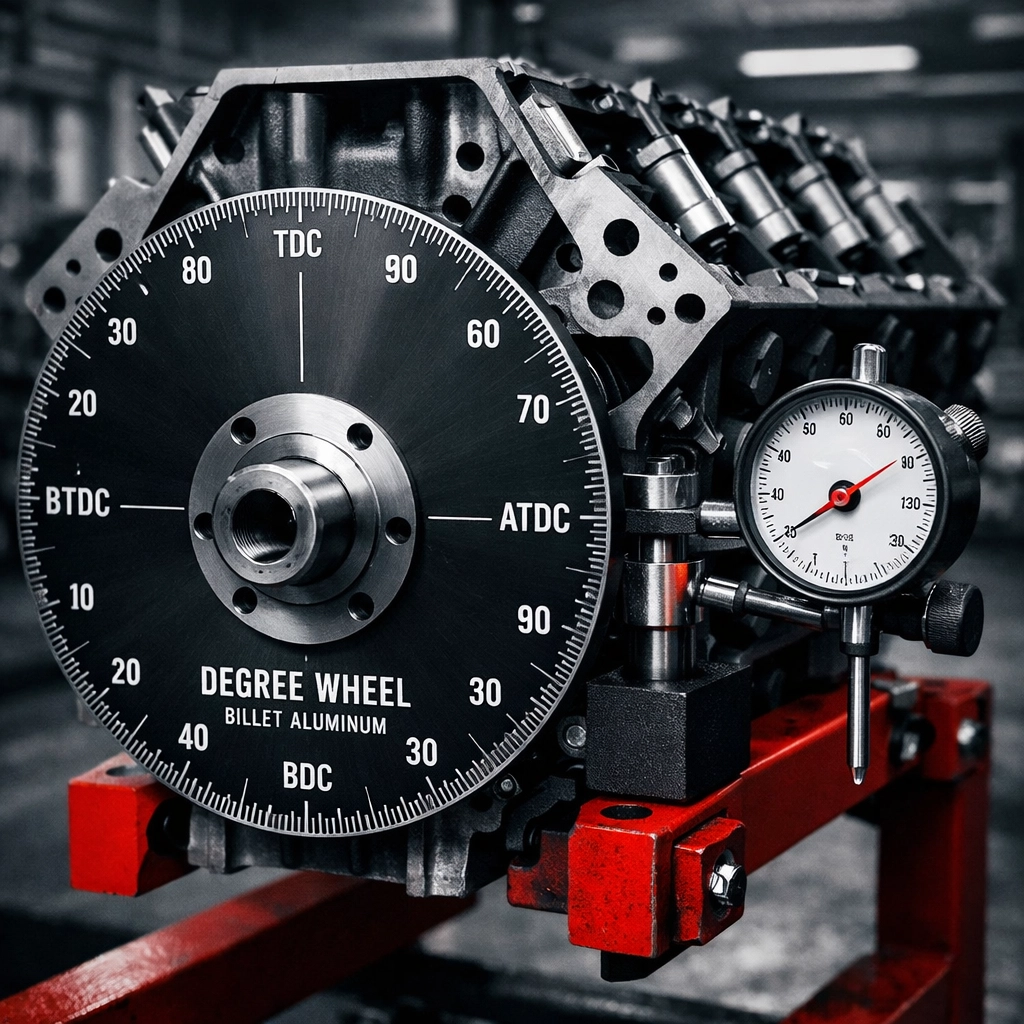
2. Blindly Trusting the Cam Card
You’ve just unboxed a shiny new performance camshaft. It comes with a “cam card” that tells you exactly when the valves should open and close. It’s tempting to just line up the timing marks on the gears and call it a day.
The Mistake: Thinking the manufacturer’s specs are a guarantee. Errors happen during grinding, or perhaps the timing set you bought has a slight variance. If your cam is off by even a few degrees, you lose power, or worse, you risk piston-to-valve contact.
The Fix: You must find “True Top Dead Center” (TDC) and degree the cam. This requires a degree wheel and a dial indicator. Never assume the mark on your harmonic balancer is 100% accurate. By verifying the intake center line yourself, you ensure the engine breathes exactly how it was designed to. This is a standard step in our engine swap shop: we never trust, we always verify.
3. Honing Without a Torque Plate
If you’re sending your block to a local machinist who doesn’t specialize in performance, or if you’re attempting to “freshen up” the bores yourself, you might be overlooking bore distortion.
The Mistake: Honing the cylinders while the block is “naked.” When you eventually bolt your cylinder heads down and torque them to 70+ lb-ft, the block actually stretches and distorts. A cylinder that was perfectly round on the stand becomes slightly oval-shaped once the heads are on. This leads to poor ring seating, blow-by, and lost compression.
The Fix: Always use a torque plate during the final hone. A torque plate mimics the stress of an installed cylinder head. At FT Motorsports, we use torque plates for every high-performance build to ensure that when your engine is running, the cylinders stay perfectly round. This is the level of precision a dedicated performance engine builder brings to the table.
4. Skipping Non-Destructive Testing (NDT)
We get it: performance parts are expensive, and you’re itching to get to the “fun” part of the build. Many enthusiasts buy a used block or a set of heads and go straight to the machine shop for a bore or a valve job.
The Mistake: Spending $1,000 on machining only to find out during assembly (or after the first heat cycle) that the block has a hairline crack in the water jacket.
The Fix: Before a single tool touches your parts, they need to be cleaned and inspected. We utilize magnetic particle inspection (Magnafluxing) for iron parts and pressure testing for aluminum heads. It’s better to spend a little upfront to confirm your foundation is solid than to build a high-horsepower “paperweight.” If you aren’t sure if your parts are worth saving, check out our About Us page to see how our 20 years of experience helps us spot red flags early.

5. Ignoring Ring Gaps for Your Power Goals
“Out of the box” rings usually come with a “standard” gap. For a grocery getter, that might be fine. For a performance build, it’s a ticking time bomb.
The Mistake: Not gapping your rings specifically for your application. If you’re building an LS for boost or a big-block for nitrous, your rings will get significantly hotter than a naturally aspirated setup. Heat causes the rings to expand. If the gap is too small, the ends will “butt” together, which usually results in the top of the piston being ripped off.
The Fix: Calculate your ring gap based on your bore size and your intended power level. Boosted applications require a wider gap to accommodate the extra heat. We meticulously hand-file every ring to ensure that even at peak temperature, your engine stays in one piece. This is a critical step in any ls swap shop project that involves forced induction.
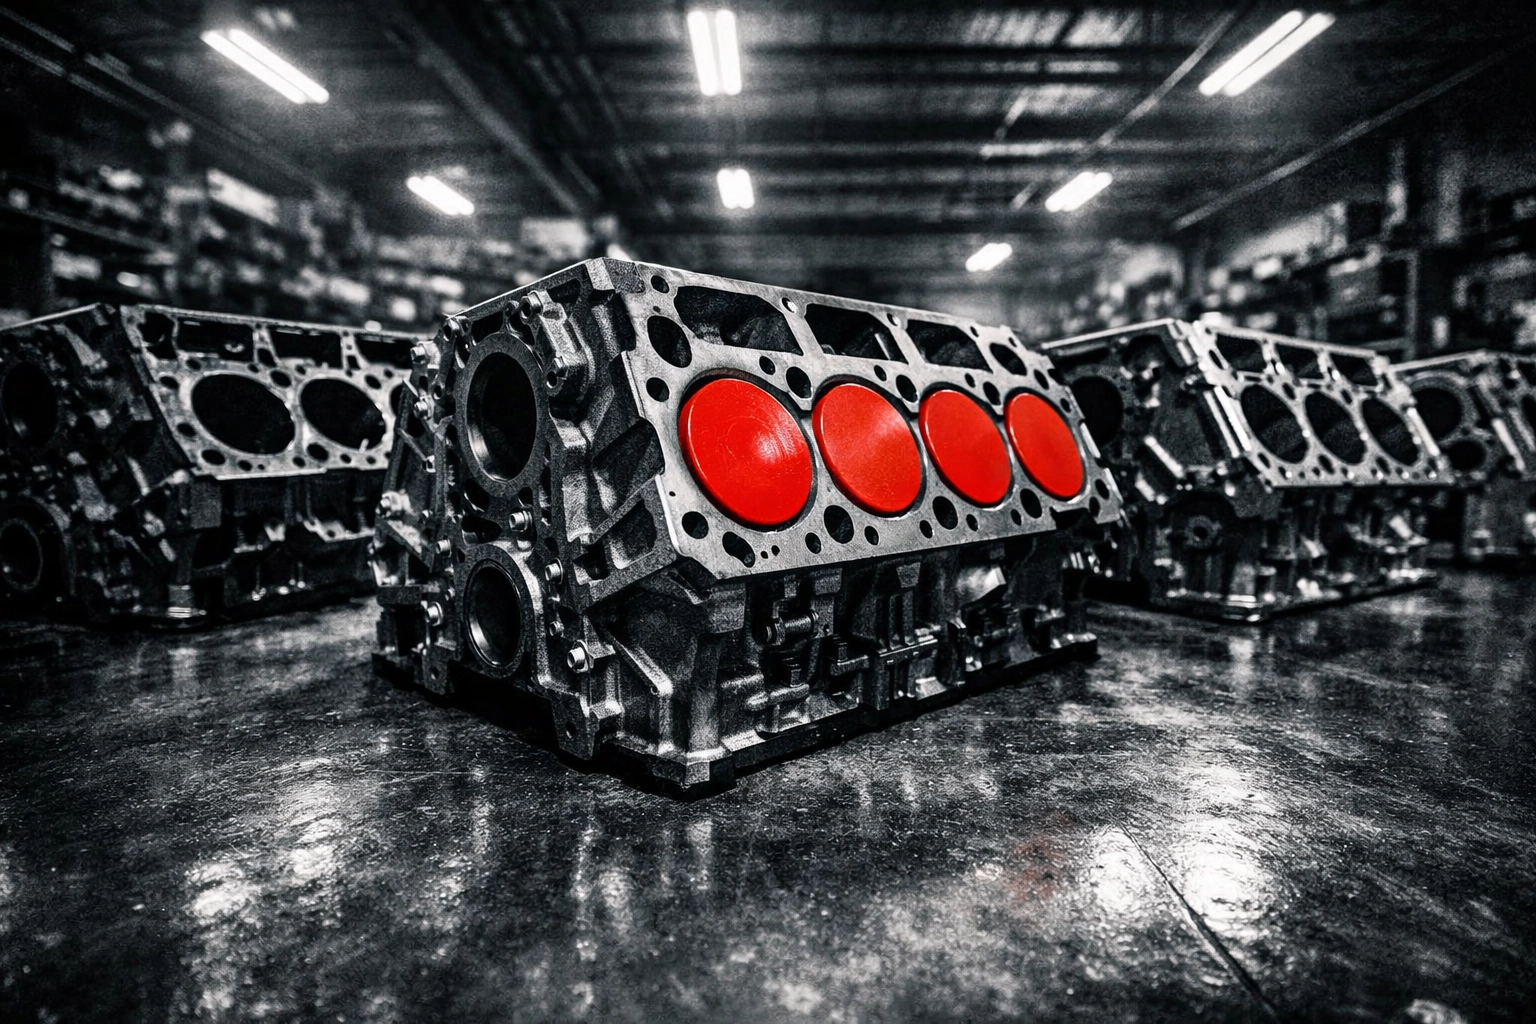
6. Choosing Castings Based on Convenience
In the world of custom builds, “good enough” rarely is. We often see builders choose a specific cylinder head or block simply because it was available on Craigslist or sitting in the back of the garage.
The Mistake: Settling for the wrong casting numbers. Not all blocks are created equal; some have thinner walls, while others lack the reinforced webbing needed for high-torque applications. Choosing the wrong cylinder head volume can also ruin your compression ratio, leaving you with a “lazy” engine that won’t rev.
The Fix: Do your homework first. If you need a specific vintage block or a high-flow casting, don’t compromise. If you’re overwhelmed by the options, our services include expert consultation to help you pick the right foundation for your goals. We handle the technical drivetrain work others avoid because we know which parts can actually handle the abuse.
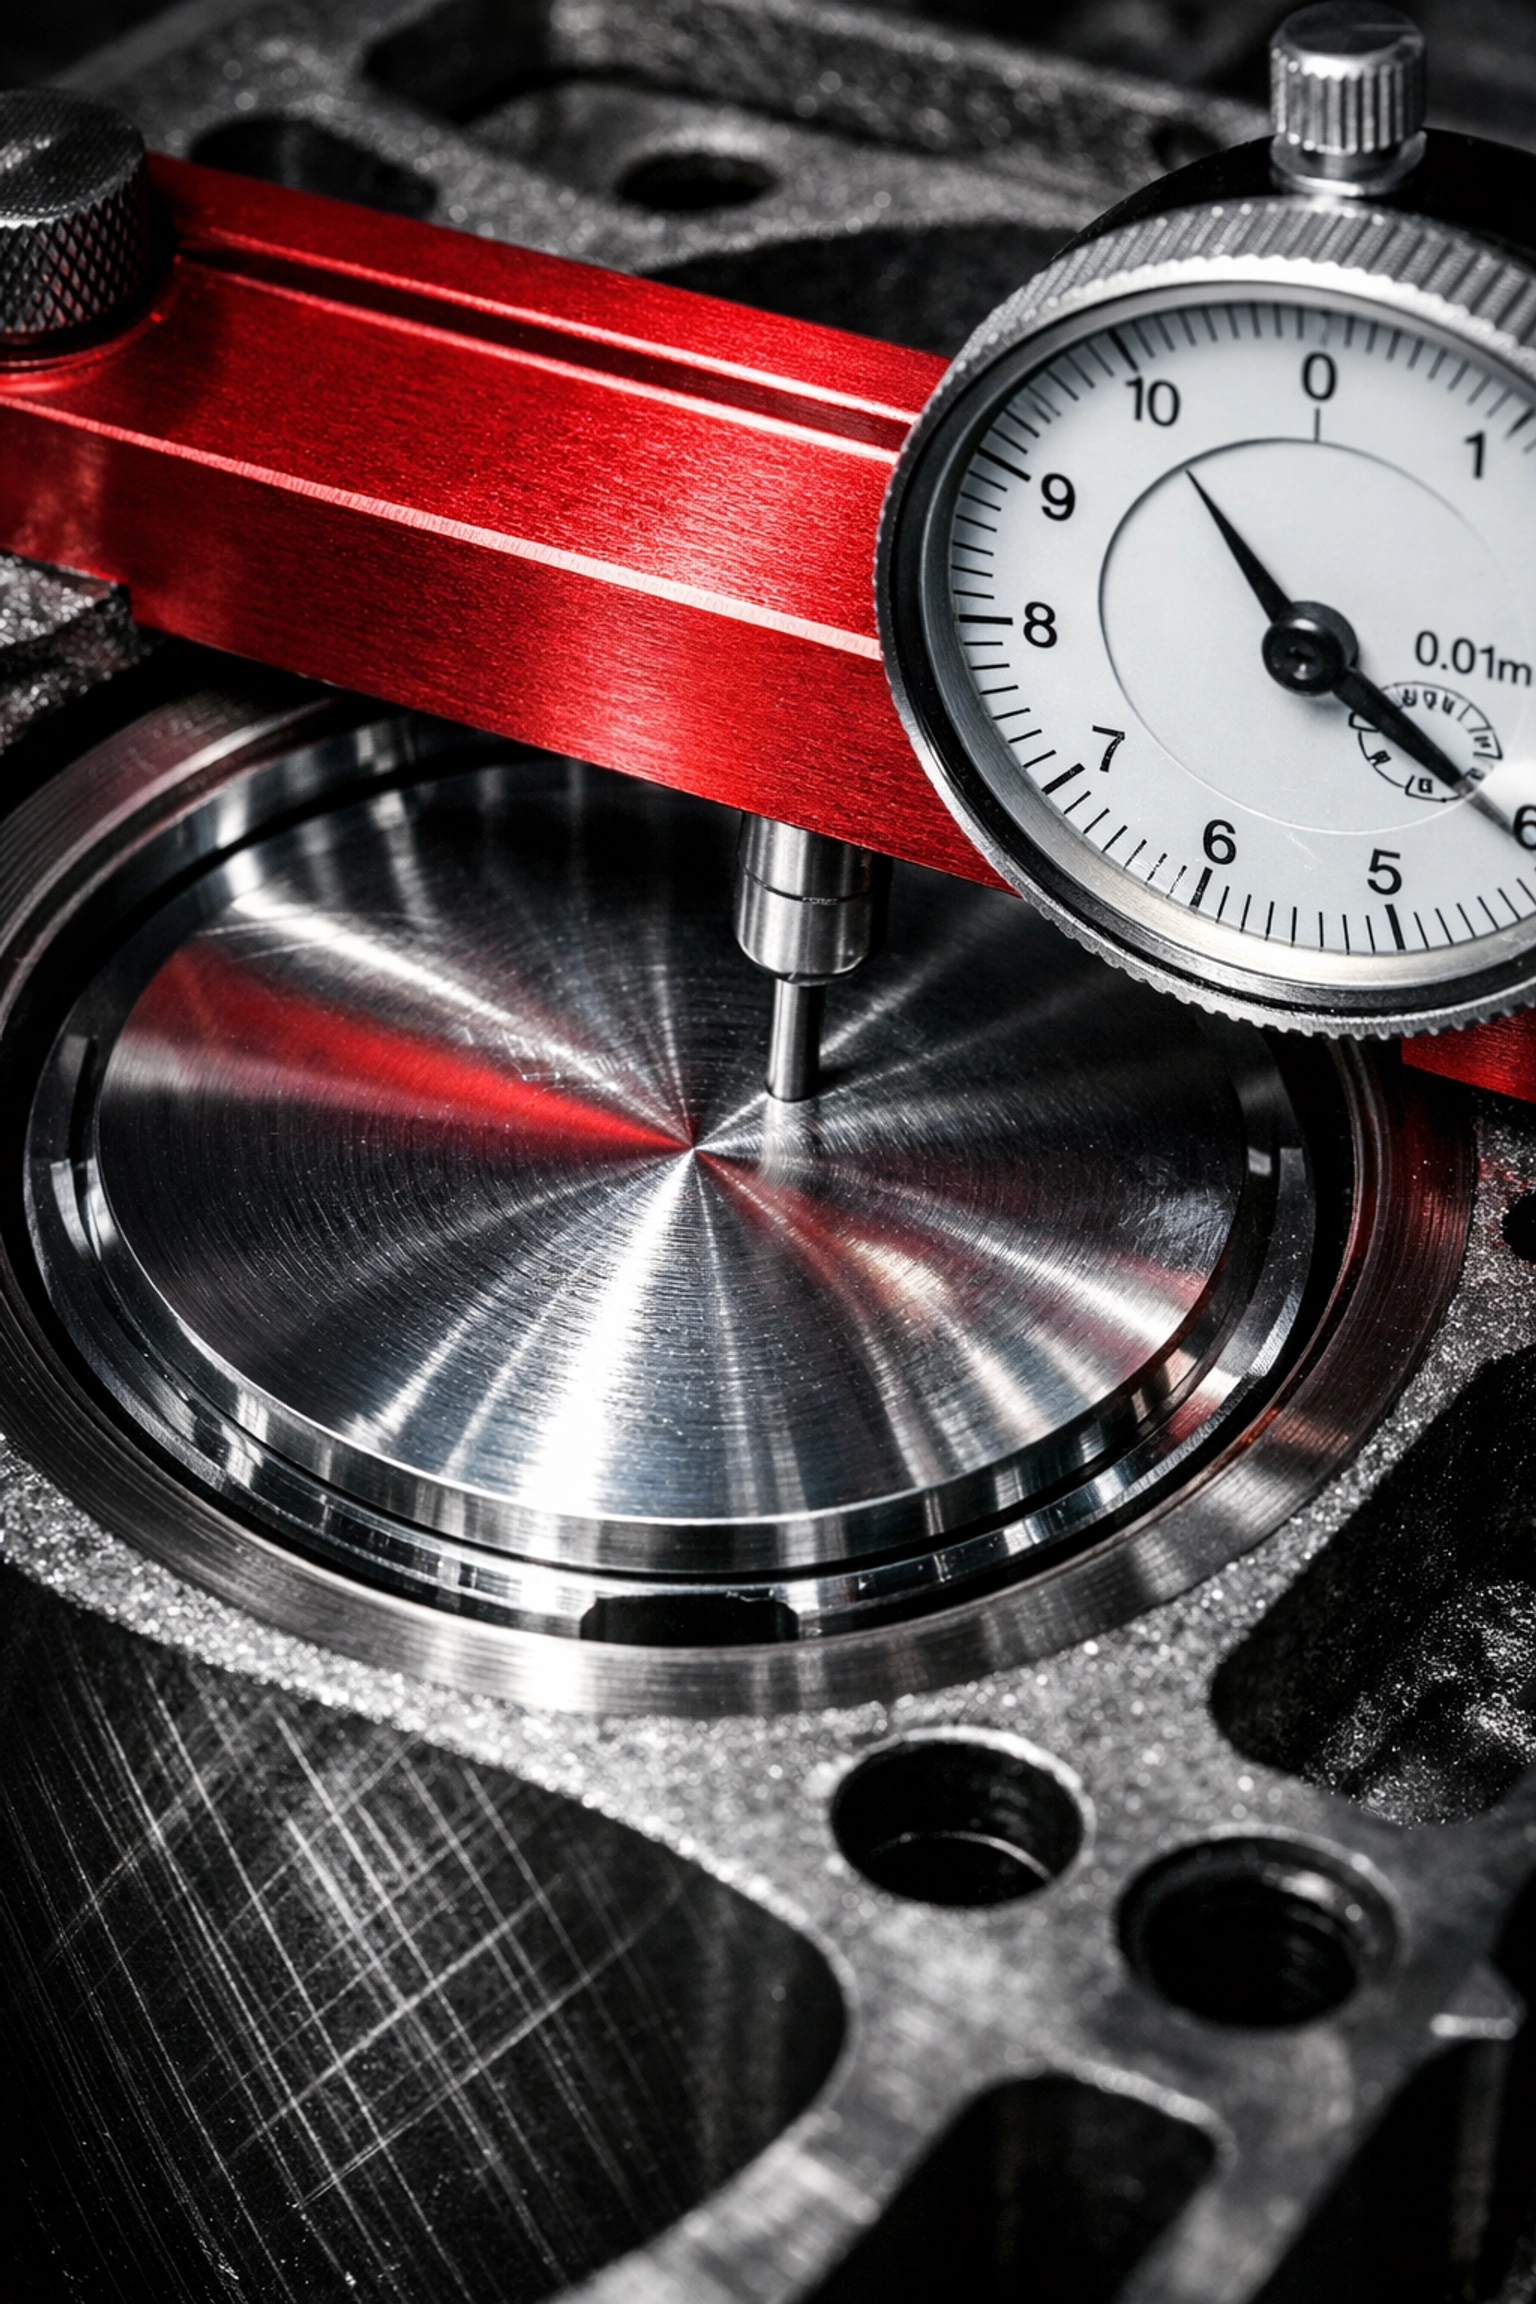
7. Miscalculating “Squish” and Deck Height
The “squish” area (or quench) is the space between the flat part of the piston and the flat part of the cylinder head at TDC. It’s one of the most misunderstood aspects of engine building.
The Mistake: Having a piston “buried” too deep in the hole or using a head gasket that is too thick. This creates a large, inefficient squish gap, which leads to poor flame propagation and makes the engine much more prone to detonation (pinging).
The Fix: You need to measure your deck height (how far the piston is above or below the block surface) and choose your head gasket thickness accordingly. Aiming for a squish gap of around .035″ to .045″ (depending on the build) creates turbulence that mixes the air and fuel better, allowing for more timing and more power without detonation. It’s the difference between an engine that just runs and one that performs.
Why Precision Matters
Building an engine isn’t just about bolting parts together; it’s about managing clearances and understanding the physics of internal combustion. When you’re pushing the limits of a custom engine build, the margin for error disappears.
At FT Motorsports, we don’t just “fix” engines; we engineer them for longevity and performance. Whether you are looking for a reliable ls swap shop to handle your classic truck conversion or you need a dedicated performance engine builder for a track-ready monster, we bring two decades of specialized expertise to the bench.
We pride ourselves on being an appointment-only facility. Why? Because quality takes time, and every build deserves our undivided attention. We don’t do “assembly line” work. We do personalized, high-stakes performance work that requires a steady hand and an expert eye.
Ready to Build It Right?
If you’ve realized your DIY project might be over its head, or if you want to ensure your next build starts on the right foot, don’t hesitate to reach out. From selecting the right tire size for your project 33s vs 35s vs 37s to full-scale drivetrain overhauls, we are here to help.
Don’t leave your performance to chance. Give your build the expert touch it deserves so you can hit the road: or the track: with total peace of mind.
Contact us today to schedule your consultation. Let’s build something legendary together.